Himeko: Guide, Skills, Builds, Teams & More
Himeko is one of the seven Standard 5-star units in the game and is always available from all banners. An AoE Damage Dealer with a gimmick centered around breaking enemies, Himeko was once one of the best units for Pure Fiction mode until the recent change in the enemies’ composition in the mode. Nowadays, Himeko is still a solid pick for this mode, but far from the glory she once had.
Himeko HSR Kit Overview (Trace Level 10)
Himeko’s primary gimmick is her Talent – Victory Rush. When an enemy gets weakness broken, she gains 1 stack of Charge. Elite and Boss enemies will grant her 3 Charges instead. When she reaches 3 stacks of Charge, she will consume all Charge stacks and immediately launch a Follow-up Attack. This is one of her three major sources of damage alongside her Skill and Ultimate. Himeko’s primary usage in Pure Fiction and against AoE contents in general hinges on how often she can trigger this effect.
Himeko’s Skill – Molten Detonation is a Blast-type attack, while her Ultimate – Heavenly Flare is an AoE Attack. Both of these attacks are rather generic with no additional caveat, except that for each enemy defeated by her Ultimate, she will regain 5 extra Energy.
Like most launch units, Himeko’s major traces are also quite straightforward. Her first major trace – Starfire gives her a 50% base chance to inflict Burn on the enemies, which deals Fire DoT damage to them for 2 turns equal to 30% of Himeko’s attack. This effect on its own is pretty irrelevant, but it does synergize with her second major trace – Magma, which increases her Skill damage against enemies with Burn by 20%. Her last trace – Benchmark increases her Crit Rate by 15% when her HP is above 80%.
Himeko’s Technique is a Dimensional-type technique that reduces enemies’ Fire Damage taken by 10% for 2 turns upon entering battle.
Himeko’s Multiplier Value is quite low, and thus highly unsuited when used in content with a high HP Single-Target enemy. She excels against enemies with shared HP-bar, or high enemies count, where she can trigger her follow-up attack as much as possible. She can be played as a hypercarry, but the amount of content she can handle would be even more limited, and thus is best played when paired with another Damage Dealer. Himeko does not care if she is the one breaking, so she has exceptional synergy with units that can help break enemies, either via having high Toughness Damage, implanting weakness, providing Exo-Toughness mechanics, or improving Break Efficiency.
Himeko HSR Core Skills

Basic Attack – Sawblade Tuning: Deals Fire DMG equal to 100% of Himeko’s ATK to a single enemy.

Skill – Molten Detonation: Deals Fire DMG equal to 200% of Himeko’s ATK to a single enemy and Fire DMG equal to 80% of Himeko’s ATK to enemies adjacent to it.

Ultimate – Heavenly Flare: Deals Fire DMG equal to 230% of Himeko’s ATK to all enemies. Himeko regenerates 5 extra Energy for each enemy defeated.

Talent – Victory Rush: When an enemy is inflicted with Weakness Break, Himeko gains 1 point of Charge (max 3 points).
If Himeko is fully Charged when an ally performs an attack, Himeko immediately performs 1 Follow-up ATK and deals Fire DMG equal to 140% of her ATK to all enemies, consuming all Charge points.
At the start of the battle, Himeko gains 1 point of Charge.

Technique – Incomplete Combustion: After using Technique, creates a Special Dimension that lasts for 15 second(s). After entering battle with enemies in the Special Dimension, there is a 100% base chance to increase Fire DMG taken by enemies by 10% for 2 turn(s).
Himeko HSR Traces

Starfire: After using an attack, there is a 50% base chance to inflict Burn on enemies, lasting for 2 turn(s).
When afflicted with Burn, enemies take Fire DoT equal to 30% of Himeko’s ATK at the start of each turn.

Magma: Skill deals 20% more DMG to enemies currently afflicted with Burn.

Benchmark: When current HP percentage is 80% or higher, CRIT Rate increases by 15%.
Himeko HSR Eidolons

- Childhood: After “Victory Rush” is triggered, Himeko’s SPD increases by 20% for 2 turn(s).
- Convergence: Deals 15% more DMG to enemies whose HP percentage is 50% or less.
- Poised: Skill Lv. +2, up to a maximum of Lv. 15. Basic ATK Lv. +1, up to a maximum of Lv. 10.
- Dedication: When Himeko’s Skill inflicts Weakness Break on an enemy, she gains 1 extra point(s) of Charge.
- Aspiration: Ultimate Lv. +2, up to a maximum of Lv. 15. Talent Lv. +2, up to a maximum of Lv. 15.
- Trailblaze!: Ultimate deals 2 extra instances of Fire DMG equal to 40% of the original DMG to one random enemy.
Eidolon Priority
Himeko’s Eidolons are all very low value. Her best Eidolons are probably her E4 and E6, one helping her get Charge stacks more often and the other improving her Ultimate damage output, but they both provide negligible improvement.
- Eidolon 1: Low
- Eidolon 2: Low
- Eidolon 4: Low
- Eidolon 6: Low
Himeko HSR Build Guide Overview
Light Cones
- Night on the Milky Way
- A Dream Scented in Wheat
- Eternal Calculus
- The Day The Cosmos Fell
- The Seriousness of Breakfast
Main Stats
- Body: Crit Rate% / Crit Damage%
- Feet: Attack%
- Orb: Fire Damage% / Attack%
- Rope: Attack%
Relics
- The Ashblazing Grand Duke
- Scholar Lost in Erudition
Planar Set
- Inert Salsotto
- Duran, Dynasty of Running Wolves
- Sigonia, the Unclaimed Desolation
HSR Himeko Light Cones
Premium Options
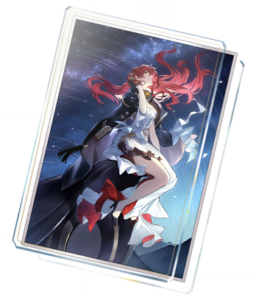
Night on the Milky Way: For every enemy on the field, increases the wearer’s ATK by 9% / 10.5% / 12% / 13.5% / 15%, up to 5 stacks. When an enemy is inflicted with Weakness Break, the DMG dealt by the wearer increases by 30% / 35% / 40% / 45% / 50% for 1 turn.
Himeko’s Signature Light Cone is accessible for most players via the shop, and it boosts her performance in most situations. However, 30 potential pulls are a lot to give up if players do not get this from offbanners, and Himeko has a lot of good F2P options, so it is not a recommended purchase.

A Dream Scented in Wheat: Increases the wearer’s CRIT Rate by 12% / 14% / 16% / 18% / 20%. The Ultimate DMG and Follow-up ATK DMG dealt by the wearer increase by 24% / 28% / 32% / 36% / 40%.
Not just for Himeko, this is a very solid Light Cone from Battle Pass that works with many Erudition units if players are willing to spend and pick it up over multiple patches.
F2P Options

Eternal Calculus: Increases the wearer’s ATK by 8% / 9% / 10% / 11% / 12%. After using an attack, for each enemy target hit, additionally increases ATK by 4% / 5% / 6% / 7% / 8%. This effect can stack up to 5 times and last until the next attack. If there are 3 or more enemy targets hit, this unit’s SPD increases by 8% / 10% / 12% / 14% / 16%, lasting for 1 turn(s).
A good Erudition Light Cone that most Erudition units can use due to its high base stats and generic boosts.

The Day The Cosmos Fell: Increases the wearer’s ATK by 16% / 18% / 20% / 22% / 24%. When the wearer uses an attack and at least 2 attacked enemies have the corresponding Weakness, the wearer’s CRIT DMG increases by 20% / 25% / 30% / 35% / 40%, lasting for 2 turn(s).
One of the two Erudition Light Cones one can get from the Memory of Chaos / Pure Fiction / Apocalyptic Shadow shop, it has great synergy with Himeko as she is mostly used against Fire-weak enemies.

The Seriousness of Breakfast: Increases the wearer’s DMG by 12% / 15% / 18% / 21% / 24%. For every enemy defeated by the wearer, the wearer’s ATK increases by 4% / 5% / 6% / 7% / 8%, stacking up to 3 time(s).
Another very accessible Light Cone with a good generic boost for Erudition units. Himeko is often used to clear small mobs so she can easily stack up the Attack boost.
HSR Himeko Main Stats
- Body: Crit Rate% > Crit Damage%
- Feet: Attack%
- Orb: Fire Damage% / Attack%
- Rope: Attack%
Himeko should be built similarly to most Crit-based Damage Dealer. For her chest, either Crit Rate% or Crit Damage% is recommended, with Crit Rate% being more valuable for consistency until she can reach effectively 100% Crit Rate in combat. For boot, Attack is generally more useful since it takes a lot of Speed subs for Himeko to get to a meaningful breakpoint, as her base Speed is rather low, and most of her damage comes from her follow-up attacks, which trigger out of her turns. For Orbs, both Fire Damage% and Attack% will provide a similar boost in damage to Himeko. For Rope, Himeko does not have any Energy requirement, so Attack% will provide a more effective improvement.
HSR Himeko Sub Stats
- Crit Rate% / Crit Damage%
- Attack%
Focusing on Crit Rate% and Crit Damage% will yield the best damage output for Himeko, with Attack% substat being good results when rolling for relics as well.
HSR Himeko Relics
Option A
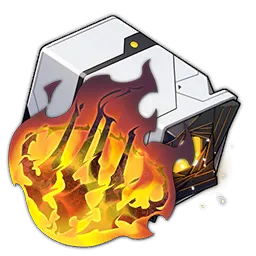
The Ashblazing Grand Duke:
- 2-Pc: Increases the DMG dealt by Follow-up ATK by 20%.
- 4-Pc: When the wearer uses a Follow-up ATK, increases the wearer’s ATK by 6% for every time the Follow-up ATK deals DMG. This effect can stack up to 8 time(s) and lasts for 3 turn(s). This effect is removed the next time the wearer uses a Follow-up ATK.
This set is Himeko’s best-in-slot, since it boosts her Follow-up Attack by a good amount. Since her Follow-up attack hits 3 times, this will also translate to a permanent 18% Attack boost for her Skill and Ultimate.
Option B

Scholar Lost in Erudition:
- 2-Pc: Increases CRIT Rate by 8%.
- 4-Pc: Increases DMG dealt by Skill and Ultimate by 20%. After using Ultimate, additionally increases the DMG dealt by the next Skill by 25%.
While this set does not boost her follow-up attacks, it gives a very valuable 8% Crit Rate and increases her two other means of damage in Ultimate and Skill.
HSR Himeko Planar Sets

Inert Salsotto:
- 2-Pc: Increases the wearer’s CRIT Rate by 8%. When the wearer’s current CRIT Rate reaches 50% or higher, the DMG dealt by the wearer’s Ultimate and Follow-up ATK increases by 15%.
Salsotto boosts two out of three of Himeko’s primary damage sources while also granting a solid 8% Crit Rate, so it is the best generic option for her.

Duran, Dynasty of Running Wolves:
- 2-Pc: When an ally uses a Follow-up ATK, the wearer gains 1 stack of Merit, stacking up to 5 time(s). Each stack of Merit increases the DMG dealt by the wearer’s Follow-up ATKs by 5%. When there are 5 stacks, additionally increases the wearer’s CRIT DMG by 25%.
Since Himeko is often used with follow-up attackers like Jade or Herta, it is very easy for her to quickly stack Duran and gains a lot of damage boost quickly.

Sigonia, the Unclaimed Desolation:
- 2-Pc: Increases the wearer’s CRIT Rate by 4%. When an enemy target gets defeated, the wearer’s CRIT DMG increases by 4%, stacking up to 10 time(s).
Sigonia’s the best set in Pure Fiction since it has a lot more small enemies than other modes, giving a total of 4% Crit Rate and 40% Crit Damage rather quickly to any holders.
HSR Himeko Teammates
Himeko can work with both crit-based hypercarry supports and AoE Sub-DPS. Due to how her follow-up attacks trigger work, she also has good synergy with units that can implant weakness or help the team break quickly.
DPS / Sub-DPS

Herta: Herta and Himeko is a tried and true combo for Pure Fiction as they can help each other trigger their follow-up attacks continuously.

Jade: Jade has high AoE attack frequency and also synergizes with characters that attack a lot, so she is a fantastic sub-DPS for many Erudition characters.
Harmony/Nihility

Tribbie: Tribbie is the premier AoE Support, especially for Dual DPS team, which makes her a natural teammate for most Himeko teams.

Fugue: Fugue has an extremely powerful Exo-Toughness mechanic, meaning Himeko can trigger her follow-up attack essentially twice as often in any fight. Himeko’s solid Toughness Damage also makes her a good Superbreak carrier for Fugue.

Ruan Mei: Ruan Mei provides an extremely rare teamwide Break Efficiency buff that lets Himeko trigger her follow-up attacks a lot quicker. Additionally, she also has good teamwide Damage and Speed boost.

Sunday / Robin: Sunday and Robin are the premium Crit-based Supports that any Crit-based Hypercarry can utilize.
Sustain

Gallagher: Gallagher has amazing Toughness Damage that can help the team in Breaking enemies and also shares the same element with Himeko.

Lingsha: Similar to Gallagher, Lingsha has amazing AoE Toughness Damage and shares her element with Himeko. She also has a lot of synergy with common Himeko’s teammates, such as Jade, Fugue, and Tribbie
HSR Himeko Teams
Himeko Hypercarry

Himeko With Sub-DPS


Mono-Fire Break-centric Himeko

HSR Himeko Value and Conclusion
By now, Himeko’s prime as a Pure Fiction specialist has long passed. She can still hang with other Damage Dealers against a side full of Fire-weak enemies, but her Multiplier Value is still a lot worse than most modern AoE Damage Dealers, and her Single Target Damage is almost nonexistent. If players have abundant of resource, Himeko can be worth raising just to give an additional option when fighting AoE-based Fire-weak content, but otherwise there is not much they’d be missing by leaving her on the wayside.
Thanks for reading! For more resources, check out our other Honkai Star Rail Guides.

